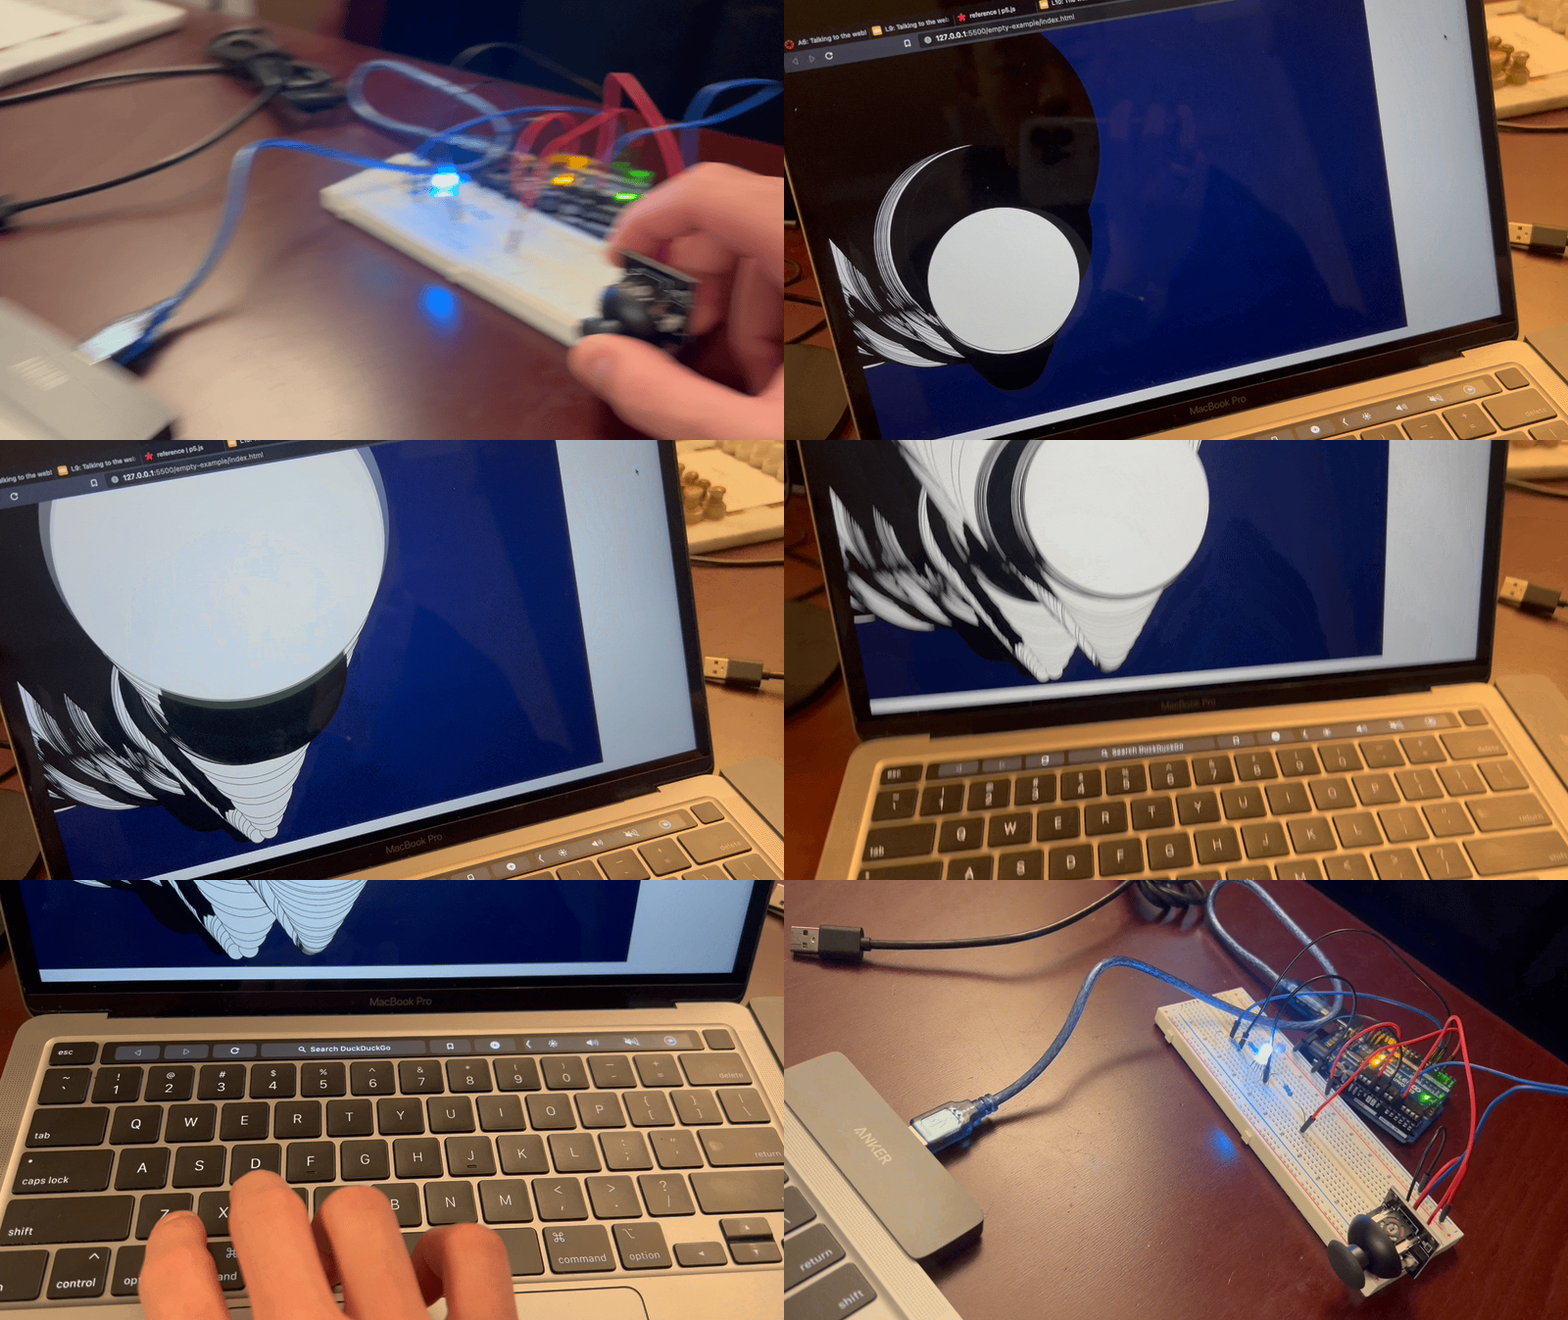
Here is me talking to the Web!

This is the GIF of my working joystick controls to the graphing of circles and changing the color slightly to my LED with keystrokes.

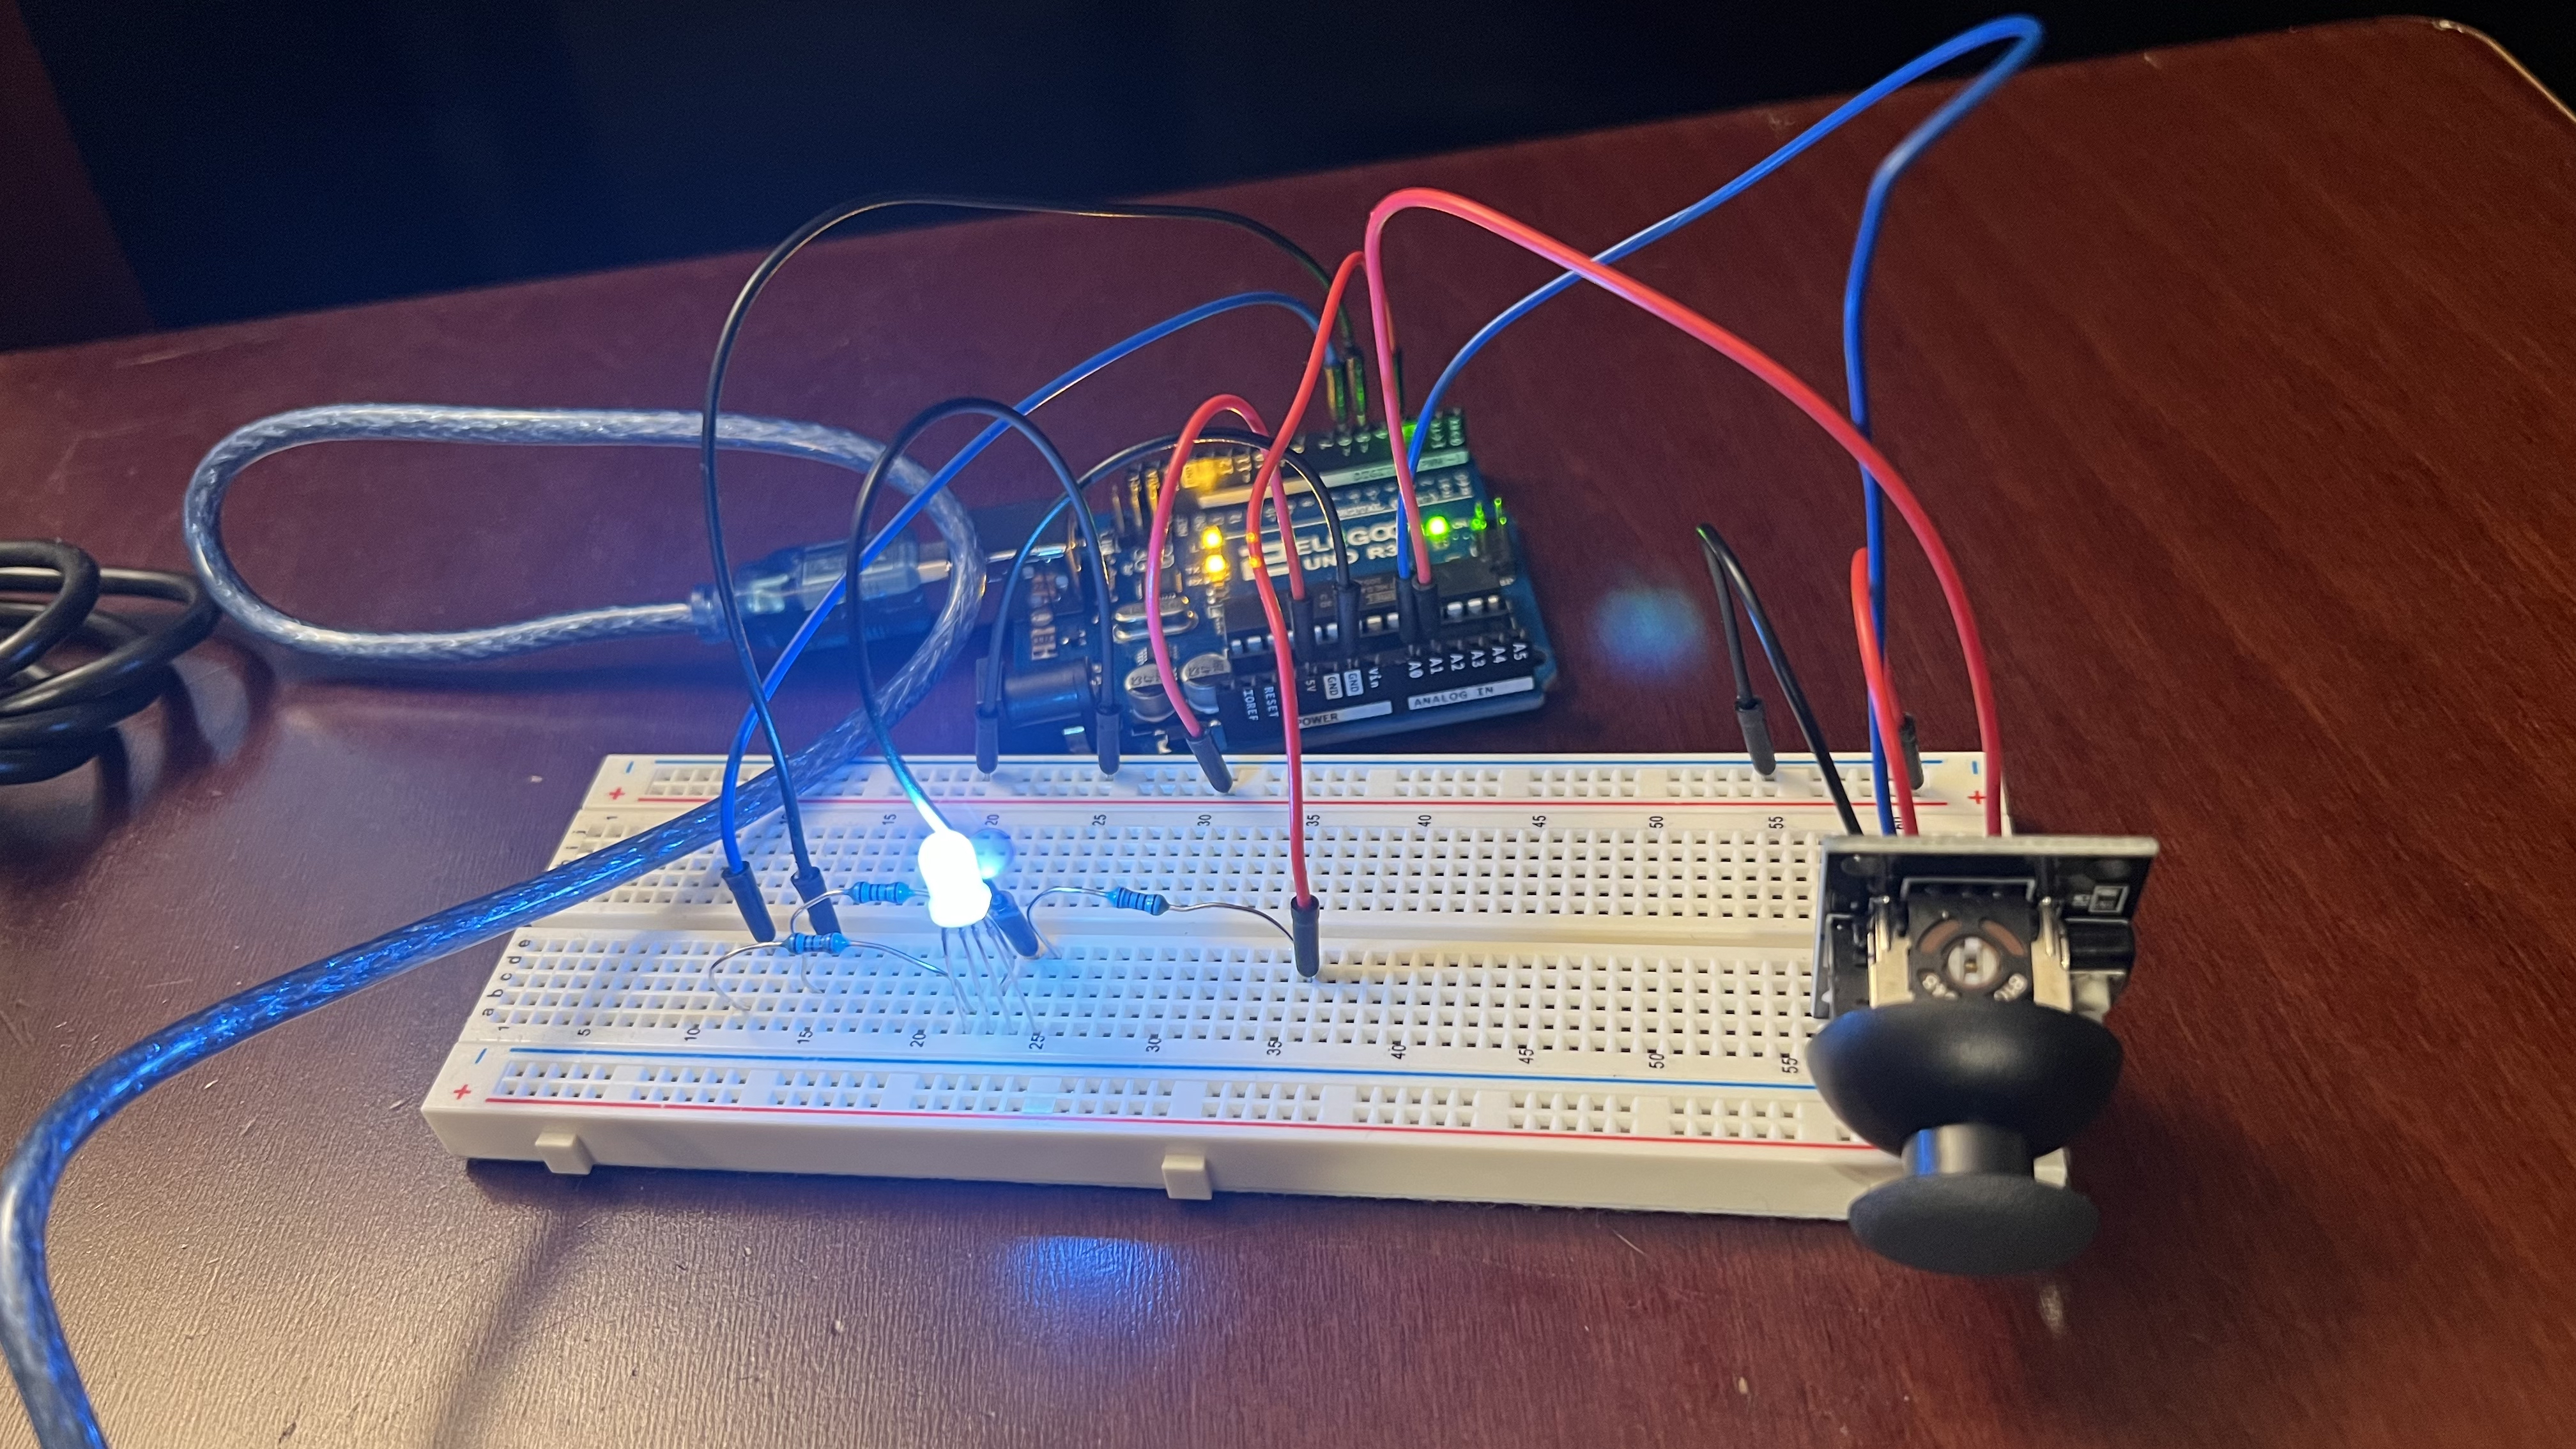
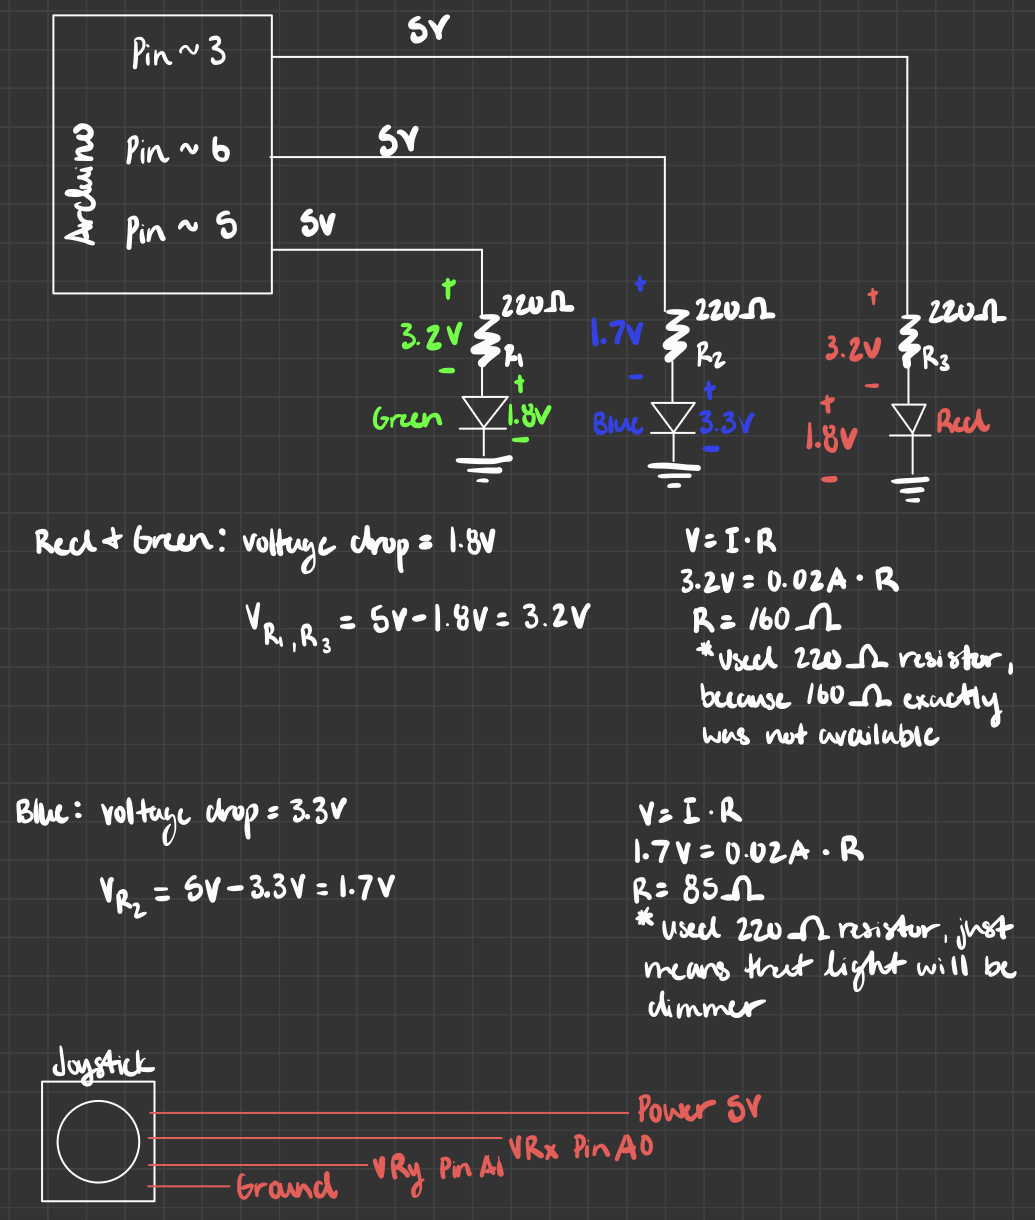
This is a picture of my circuit. Because the joystick has a resistor built into it, I did not need to use an external resistor. For the RBG LED, I used 220ohm resistors after calculatiing the minimal resistance needed with Ohm's Law. Detailed calculations can be found in my schematic.
                    int x = A0;
                    int y = A1;
                    int xval = 0;
                    int yval = 0;

                    void setup() {
                    Serial.begin(9600);
                    Serial.setTimeout(10); // set the timeout for parseInt
                    }

                    void loop() {
                    xval = analogRead(x); // reads the x values of the joystick
                    yval = analogRead(y); // reads the y values of the joystick

                    Serial.print("[");
                    Serial.print(xval);
                    Serial.print(",");
                    Serial.print(yval);
                    Serial.println("]");

                    if (Serial.available() > 0) {   // if there's serial data
                        int inByte = Serial.read(); // read it
                        Serial.write(inByte);   // send it back out as raw binary data
                        // +-10 and +20 were added so that the RGB LED would not be the same color with each key press
                        analogWrite(3, inByte - 10); // use it to set the LED brightness
                        analogWrite(5, inByte + 10); // use it to set the LED brightness
                        analogWrite(6, inByte + 20); // use it to set the LED brightness
                    }

                    }
sketch.js code below
                        var serial; // variable to hold an instance of the serialport library
                        var portName = '/dev/tty.usbmodem144401' //rename to the name of your port
                        var dataarray = []; //some data coming in over serial!
                        var xPos = 0;


                        function setup() {
                        serial = new p5.SerialPort();       // make a new instance of the serialport library
                        serial.on('list', printList);       // set a callback function for the serialport list event
                        serial.on('connected', serverConnected); // callback for connecting to the server
                        serial.on('open', portOpen);        // callback for the port opening
                        serial.on('data', serialEvent);     // callback for when new data arrives
                        serial.on('error', serialError);    // callback for errors
                        serial.on('close', portClose);      // callback for the port closing

                        serial.list();                      // list the serial ports
                        serial.open(portName);              // open a serial port
                        createCanvas(1200, 800);
                        background(0x08, 0x16, 0x40);
                        }

                        // get the list of ports:
                        function printList(portList) {
                        // portList is an array of serial port names
                        for (var i = 0; i < portList.length; i++) {
                        // Display the list the console:
                        print(i + " " + portList[i]);
                        }
                        }

                        function serverConnected() {
                        print('connected to server.');
                        }

                        function portOpen() {
                        print('the serial port opened.')
                        }

                        function serialError(err) {
                        print('Something went wrong with the serial port. ' + err);
                        }

                        function portClose() {
                        print('The serial port closed.');
                        }

                        function serialEvent() {
                        if (serial.available()) {
                            var datastring = serial.readLine(); // readin some serial
                            var newarray;
                            try {
                            newarray = JSON.parse(datastring); // can we parse the serial
                            } catch(err) {
                                //console.log(err);
                            }
                            if (typeof(newarray) == 'object') {
                            dataarray = newarray;
                            }
                            console.log("got back " + datastring);
                        }
                        }

                        function graphData(newData) {
                        // map the range of the input to the window height:
                        var yPos = map(newData, 0, 1023, 0, height);
                        // draw the circle
                        circle(xPos, yPos, height - yPos);
                        // at the edge of the screen, go back to the beginning:
                        if (xPos >= width) {
                            xPos = 0;
                            // clear the screen by resetting the background:
                            background(0x08, 0x16, 0x40);
                        } else {
                            // pass
                        }
                        }

                        function draw() {
                        fill(0);
                        graphData(dataarray[0]);

                        fill(250);
                        graphData(dataarray[1]);
                        xPos++;

                        fill(color(239, 121, 138))
                        circle(mouseX, mouseY, 50);
                        }

                        function keyPressed() {
                            //console.log("writing key");
                            serial.write(key);
                        }
Here is a snippet of my code. All of my important lines of code are commented. The values from the x input of the joystick ranged from 0 to 1024 according to the serial monitor, so that is what I chose to map my input low and high values, respectively. You'll notice that I added a mouse interaction in my sketch.js code and that was just for fun, it does not interact with my LED only keystrokes do.

Here is the schematic that I drew up for my joystick and RGB LED.